
nitro group adBlueOBD2 for MB Atego Euro 6 Remove adBlueOBD
Behind fuses in the middle is a plug- as in the price (not right like in manual-correct is middle)
Connnection colors-White with Blue (Truck side) with White (Truck side)
Red wire from emulator connection with any(+)after ignition
Black i GND
Next step is remove Fuse
F23 Thats all
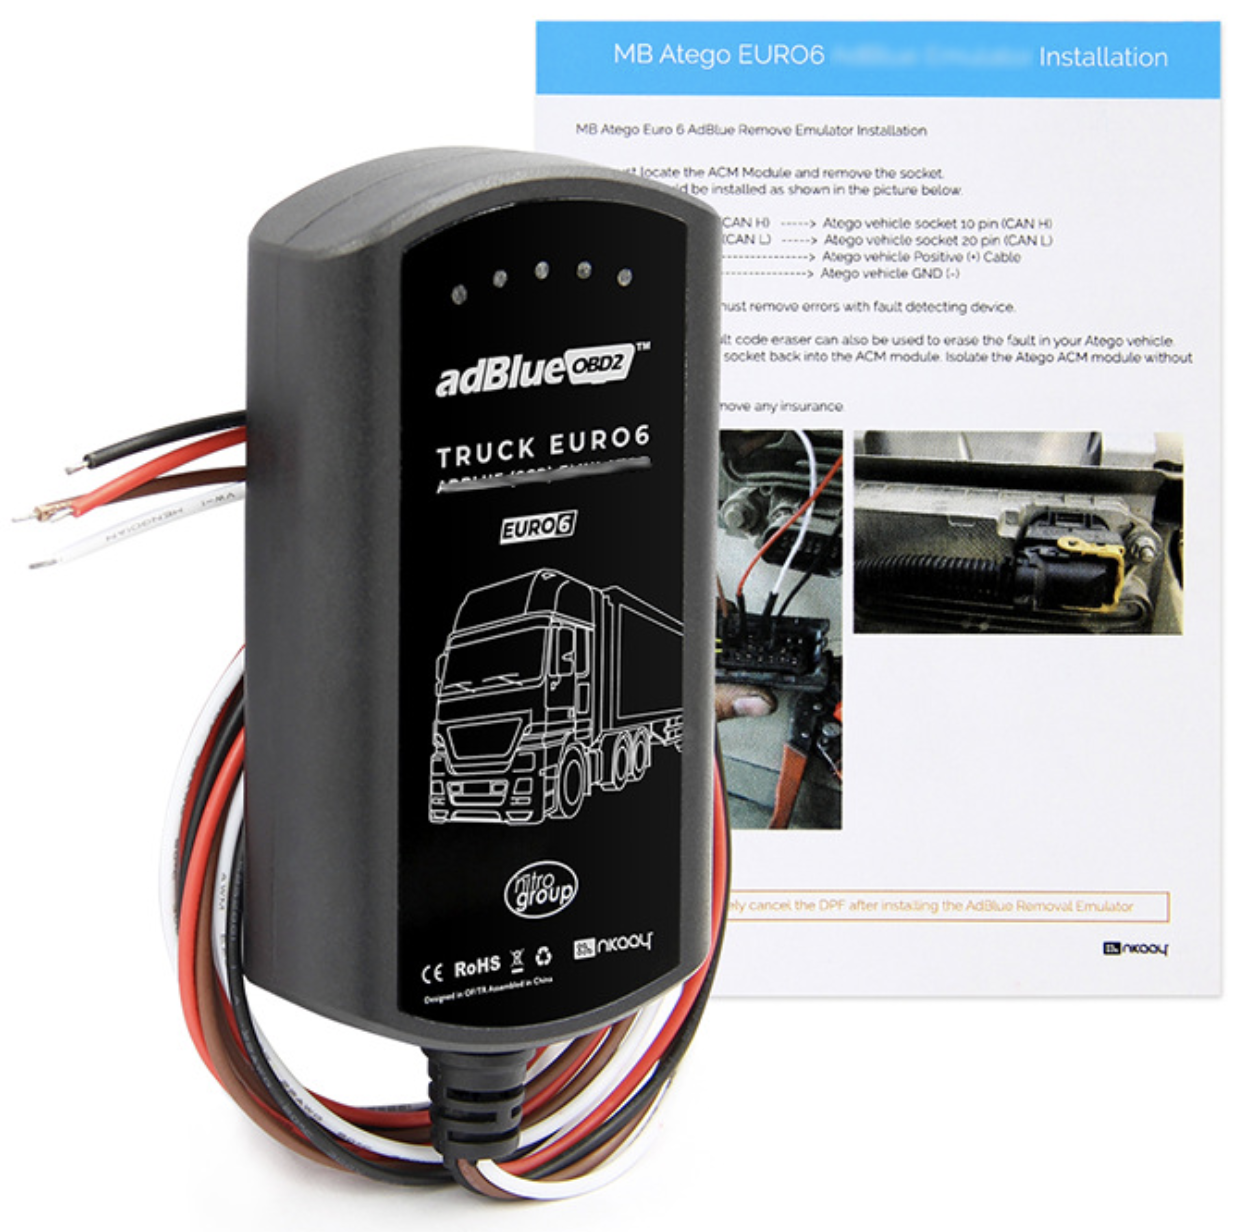
You must locate the ACm Module and remove the socket.
The cable should be installed as shown in the picture below.
adBlueOBD2 White cable(CAN H) —–>Atego vehicle socket 10 pin(CAN H)
adBlueOBD2 Brown cable (CAN L) —–> Atego vehicle socket 20 pin (CAN L)
adBlueOBD2 Red (+) —–>Atego vehicle Positive(+)Cable
adBlueOBD2 Black(-) —–>Atego vehicle GND (-)
After installation, you must remove errors with fault detecting device.
The DTC fault code eraser can also be used to erase the fault in your Atego vehicle
You will not mount the socket back into the ACM module Isolate the Atego ACh nodule without damage.
nitro group adBlueOBD2 for Daf Euro 6 460 480 Remove
You must attach the adBlueOBD2 to the rear of the silencer under the EASecu.
You must first disconnect the nox sensor cables and connect the adBlueOBD2 cables to theNOxcables.
you must obtain fuseoF22 (e497 15A)
CAN cables are located at the top of the NOx socket.
Carsidemutator side
CAN H———————–>WHITE cable
CAN L————————> BROWN cable
POWER(+)——————–>REDcable
GND(-)————————> Black cable
IMPORTANT NOTE:Only the CANcables are to be connected from the NOx socket as the truck’sfuse has been taken.For power connections you need to use ground (GND) and contact(+).
Youmust clear the error codes from the engine ECU, If you do not have DAVIE software, you canus DAFEuro 6 DTC Eraser.
The connection type DAF460/480 is the same but the NOx socket locations are different. Thefollowing are shown.